My second fall quarter has begun! It is hard to believe that I have been in Muskegon over a year and how far I have come personally and in school... I know that pastry school is exactly where I want to be because I am still excited for each day of class (even if it IS at 7 am!!)
So, I am now in Advanced Confectionary Arts II, which is all things chocolate and confections (candy, caramel, jellies, marshmallows, etc), and I am lucky enough to have the department chair of the Baking and Pastry program as an instructor. He is an extremely talented pastry chef and a great teacher. The past two weeks we have been concentrating on bonbons (molded chocolate), truffles (hand rolled or cut chocolate), and pate de fruit (French for fruit paste). Here are the pictures!
Day 1 of class: learning and tasting some of the world's best chocolate (breakfast of champions!)

This is a tempering machine. When making chocolates it must be properly tempered or precrystallized so it dries with shine and that snap that great chocolates have. Each type of chocolate will have guidelines on how to temper properly, but basically you change the temperature 3 times to form the correct crystal structure and this machine will maintain that last temperature so it can be used for several hours. As you can see, it is a messy process, so being clean is a great quality to have (and I am for sure still trying to master that one!)

So, I used the tempered chocolate to fill these molds. I dumped chocolate all over then flipped them over and pounded out the excess. A loud and messy job (and really hard to get a picture of, but I will try before the end of class!)

My first filling idea: chai ganache. I used the liquid chai used in many coffee shops plus I ground spices (cardamom, black pepper, cinnamon, star anise and a few others...) and added that to milk chocolate

Here is another mold (it is a cacao bean) with a passionfruit ganache filling (I actually DIDN'T make this filling, chef did a demo on fruit ganache and I took some, but I did enrobe the molds with chocolate which is the hardest part!!

So, here is my production from week 1. On the left, the cacao bean mold with passion fruit (yes, that is purple!), the gold dusted shapes and squiggly design are the chai and all the red colored mold are my second flavor idea: cinnamon and cayenne pepper ganache-it kind of tasted like red hots!
So, before pouring chocolate in the molds, we are painting them with colored cocoa butter in a variety of ways (spray gun, finger painting: the possibilities are endless!!) With the chocolates below with the squiggly design I used a transfer sheet (thin plastic with the design painted) and I laid it on the bottom of then mold, then as the tempered chocolate dries, it will pick up the design. Easy and really impressive!! Notice how the colored bonbons are so shiny? That's from the cocoa butter colors (the natural fat in cocoa beans) and when at room temperature really reflect the light.

So, that was week one! Although the above pictures are pretty sweet, wait until you see week 2!! The whole class got exponentially better with the entire process and made some really great looking products!
I did take a little break from chocolates to enjoy some amazing art in Grand Rapids for a contest called Artprize. It is an open art competition and the pieces are spread out all over town in different venues (might be a bank, restaurant, or outside). The public votes and the 1st place winner gets $250,000-whoa!! Click to see the winner of artprize 2011! Here are some pictures of other great pieces!


This is made from little crocheted squares-it was huge!

Hard to see, but it's Barrel O' Monkeys on one of the bridges!

Sweet octopus table (functional art: love it!)

We also stopped at San Chez (check out there awesome menu!) for some tapas and a beverage (looking at art really takes it out of you, ya know?) We tried not to overindulge and picked only 4 "small" plates... everything was SO good!!
Michigan beer (the size of a wine bottle!!!) and a yummy cocktail with lime and cucumber!

Pesto hummus with crazy chips!

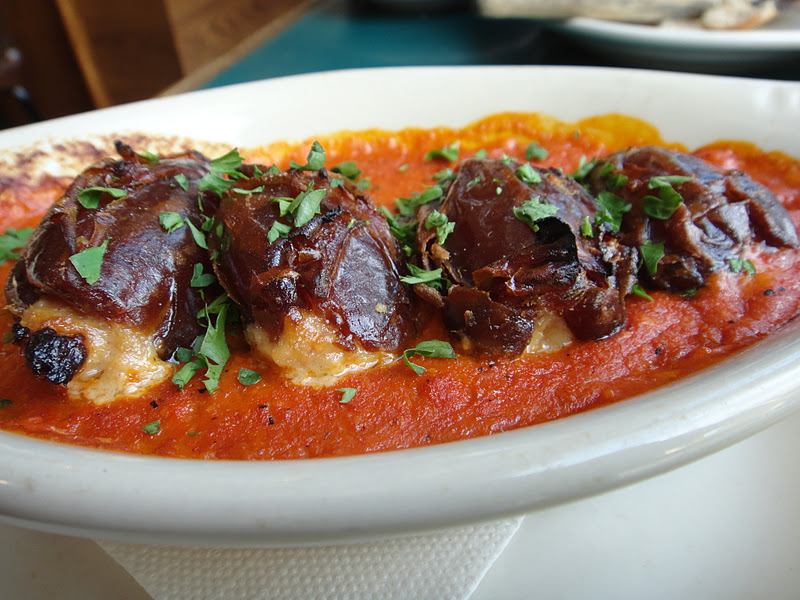
Dates stuffed with pork belly, goat cheese and caramelized onions in a spicy romesco sauce
Cheese casserole with corn, poblano peppers, black beans, sun-dried tomatoes

Lamb, beef, and chorizo meatballs with artichokes

Start of week 2:
Here is the start of a ganache. It is basically chocolate and heavy cream in different ratios depending on how thick you want it. Other liquids can be partially substituted (like the chai flavor from week 1) but some fat is needed to create an emulsion of fat in the chocolate so it has that creamy texture. So, I have just added my hot heavy cream to chocolate and started incorporating it together.

Here it is fully incorporated: beautiful and shiny!

So, now I am playing food scientist and adding 3 different Mexican chili powders to my ganache for flavor. I ground them up from dried, whole chilis: chipotle, ancho, and guajillo. All have different heat and smoky properties. My goal is to have a nice warm feeling in your mouth after eating one.

I also made pate de fruit for the first time ever! Here are the ingredients to put them together: mango puree, glucose syrup, sucrose, pectin, lemon juice. That recipe is from our class book which is seriously beautiful!

Once all ingredients are added, it boils away until reaching 233 degrees

The mixture is then quickly (before the pectin starts gelatinizing) poured into a mold or some kind of form

Once it has set, it can be cut however you want! I did little strips since they are REALLY sweet and I don't want to be shoving my face with a big piece of jellied fruit!!

The final step is coating them in a blend of sugar and powdered citric acid (this also helps to cut the sweetness, think: sour patch kids). They were SO good, plus mango is one of my favorite fruits!

Here is the start of a caramel I am making bubbling away!

Starting to lose moisture and cook down

Just getting to the proper temperature

Here it is poured out in a mold. It was supposed to be a soft caramel that I was going to cut and dip in chocolate, but due to some humidity issues in our classroom, it cooked past that stage and was hard as a rock! It is still delicious, though! I will have pictures of what I ended up doing with it on my next post!

At the end of class on Saturday, we presented our chocolate to chef and the class. Here are my 3 bonbons, from left to right: same purple mold, but filled with lavender ganache, my Mexican chili bonbon, and a curry and coconut bonbon. I used a variety of cocoa butter coloring techniques: the purple ones are sprayed, the red and white I used my finger, and then I splattered the yellow and orange colors. These were awesome to make!!

I cut each bonbon in half so you can see the fillings. The left is the coconut and curry, middle is lavender, and the right is the Mexican chili. It is important with filling the molds that the chocolate layer isn't too thick and it is uniform. These aren't too bad for my second week!

Another cool technique is making spheres! I took 2 of my coconut curry bonbons and "glued" them together. At the right angle you cant even see the seam!

Here are the trays of all of our work! Some of the best went to the Sweet Spot, our school's bakery to be sold to the public!

What I am loving about chocolates is how visually appealing they are!! I am looking forward to experimenting with some other funky flavors and showing you my work soon!